High Quality for Wet Paint Thickness Gauge - TM550FN Coating Thickness Gauge – TMTeck
High Quality for Wet Paint Thickness Gauge - TM550FN Coating Thickness Gauge – TMTeck Detail:

DESCRIPTION
This compact gauge can be used for non-destructive coating thickness measurement of non-magnetic coatings, e.g. paint, enamel, chrome on steel, and insulating coatings, e.g. paint and anodizing coatings on non-ferrous metals.
The internal probe can work on both principles, magnetic induction and the eddy currents. The probe can automatically detect the substrates type (Magnetic or not), and calculate the coating thickness and display it fast.
There are five data groups, and readings will be automatically stored to memory for general groups (Not for direct group). Each group has individual statistics, alarm limit settings and calibration. User can recall and delete specified readings easily. User does all operations via standard menu so easily. User can press the CAL button to start calibration freely.
FEATURES
1.128*128 dot matrix LCD display, standard menu operations;
2.Two measure mode: single and continuous;
3.Two group mode: direct (DIR) and general(GEN), readings will be lost when power off in direct mode, and not be lost in general mode. 80 readings can be stored for each group;
4.Zero point calibration and multi-point calibration(up to 4 points) for each group;
5.User can recall, delete specified readings, or delete group readings;
6.Statistics display: mean, minimum, maximum and standard deviation;
7.Three probe mode: auto, magnetic and eddy current;
8.User can set high or low limit alarm for each group;
9.Power off automatically;
10.USB interface to data transmission;
11.Low battery and error indication;
SPECIFICATIONS
1.Measuring principle: Magnetic induction (F-probe) and eddy current (N-probe);
2.Measuring range: 0 to 1300um (0 to 51.2mils)(can up to 1500UM if needs);
3.Accuracy: ± (3% of readings+2um);
±(3% of readings+0.078mils);
4.Resolution: 0um~999um (1um), 1000um~1300um (0.01mm); 0mils~39.39mils (0.01mils), 39.4mils~51.2mils (0.1mils);
5.Calibration: One to four point calibration, zero calibration;
6.Data Group: One direct group (readings not be stored to memory), four general group (readings can be stored), and each group have individual statistics, alarm settings and calibration;
7.Statistics: No. of readings, mean, minimum, maximum and standard deviation;
8.Units: um, mm and mils;
9.Alarm: User can set the high/low alarm, and alarm icon displayed on LCD when over the limit;
10.Minimum curvature radius: convex 1.5mm(59mils) and concave 25mm(984mils);
11.Minimum measuring size: Diameter 6mm(236mils);
12.Minimum thickness of substrate: F-probe: 0.5mm(0.02″), N-probe: 0.3mm(0.012″);
13.Computer interface: Download data via USB interface;
14.Power supply: Two 1.5v AAA battery;
15.Operation temperature: 0℃ to 40℃(32℉ to 104℉);
16.Storage temperature: -20℃ to 70℃(-4℉ to 158℉);
17.Size: 110mm*53mm*24mm (4.33″*2.09″*0.94″);
STANDARD CONFIGURATION
| Index | Item | Quantity | Note |
| 1 | Gauge | 1 | |
| 2 | Aluminium substrate | 1 | |
| 3 | Standard foil | 5 | |
| 4 | 1.5V AAA battery | 2 | |
| 5 | Technical manual | 1 | |
| 6 | USB cable | 1 | |
| 7 | Case | 1 |


Product detail pictures:
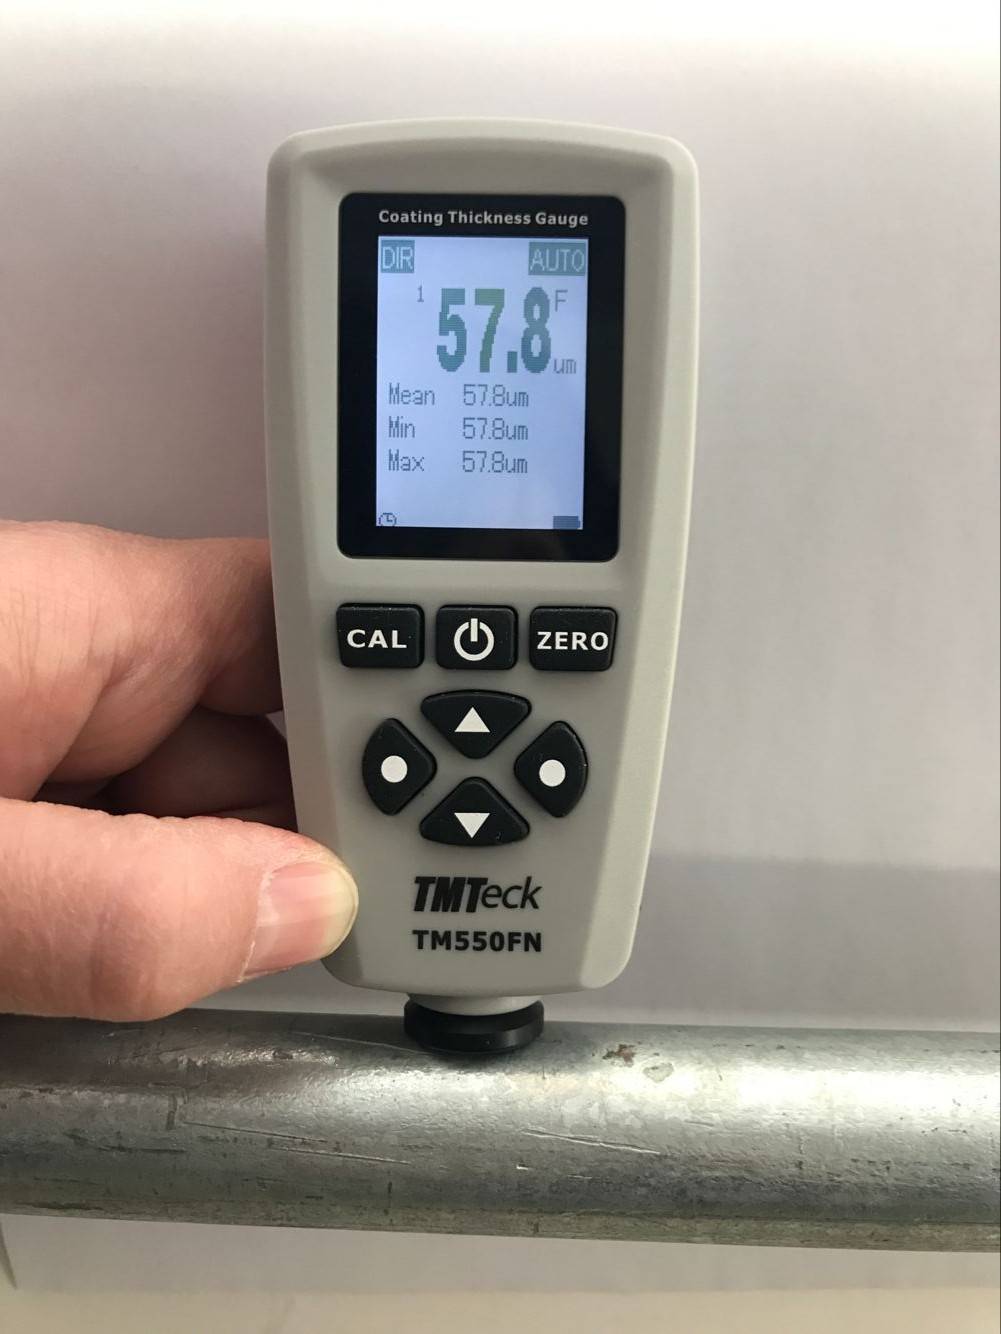
Related Product Guide:
We emphasize enhancement and introduce new solutions into the market just about every year for High Quality for Wet Paint Thickness Gauge - TM550FN Coating Thickness Gauge – TMTeck , The product will supply to all over the world, such as: Guinea, Switzerland, Malawi, Our items are widely recognized and trusted by users and can meet continuously changing economic and social needs. We welcome new and old customers from all walks of life to contact us for future business relationships and mutual success!
We have been appreciated the Chinese manufacturing, this time also did not let us disappoint,good job!

